openfire 插件开发
此blog可行http://www.blogjava.net/jyleon/articles/255623.html
补充几点:
下载的openfire包目录/openfire/documentation/plugin-dev-guide.html中介绍了怎么开发插件.
要将源代码放在openfire的源代码目录中用其build.xml来编译。
在3.6.3中,最终打成的包是.pack文件,似乎插件里面getResourseAsSream方法不能用。
在3.6.4中,最终打成的包是.jar( zip格式),penfire启动后会解压缩生成目录,可看到插件被作为一个jar包放在lib目录下。所以只要第一次使用build命令打包,在以后直接将工程打成jar包放到lib目录下即可:测试是可行的。
但是注意,不能将发布的插件jar包删除,删除了的话,对应的文件夹也会被openfire自动删除。
两个可能有用的方法:
JiveGlobals.getHomeDirectory()
Log.getLogDirectory()
再回过来详细介绍一下,之前做过的又忘了,好些东西都重来了一遍。
现在已目前最新的包openfire-3.7.1为例:
将源码下下来66M多,不知为什么一下增加这么多了。
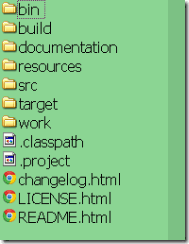
期目录结构如下图:
将我们的插件以文档(documentation\docs\plugin-dev-guide.html#Using the Openfire Build Script)规定的格式存放,
myplugin/
 |- plugin.xml      <- Plugin definition file
 |- readme.html     <- Optional readme file for plugin
 |- changelog.html  <- Optional changelog file for plugin
 |- logo_small.gif  <- Optional small (16x16) icon associated with the plugin (can also be a .png file)
 |- logo_large.gif  <- Optional large (32x32) icon associated with the plugin (can also be a .png file)
 |- classes/        <- Resources your plugin needs (i.e., a properties file)
 |- lib/            <- Libraries your plugin needs
 |- src/
     |- database    <- Optional database scripts for your plugin
     |- java        <- Java source code for your plugin
     |   |- com
     |       |- mycompany
     |           |- *.java
     |- web
         |- *.jsp      <- JSPs your plugin uses for the admin console
         |- images/    <- Any images your JSP pages need (optional)
         |- WEB-INF
             |- web.xml    <- Optional file where custom servlets can be registered
将myplugin整个文件夹放在src\plugins中。
然后在其build文件夹中可找到build.xml,使用如下命令可单独编译单个plugin,但应在编译单个plugin之前至少运行一次plugins任务,负责无法编译单个plugin,报错为lib文件夹找不到,webapp目录找不到 :
ant plugin -Dplugin=myplugin
运行命令即可在work\plugins中找到编译好的plugin。
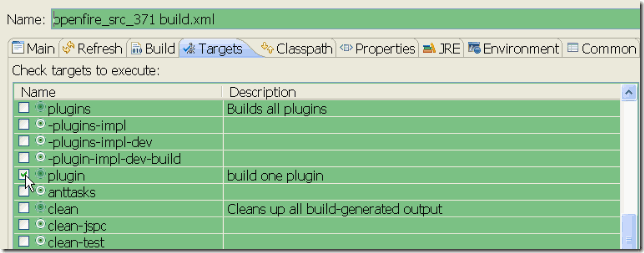
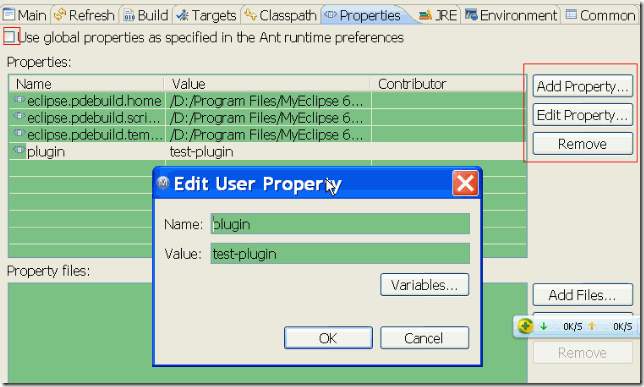
如果你在eclipse中,可右键点击build.xml, run as/Ant Build …/ 注意是三个点的那个才有更多选项。
这样配置和上面的命令行方式效果一样。
openfire提供离线消息发送,但是不提供历史消息存储。因此需要写插件来保存历史记录。


